Step-by-Step Sod Installation Instructions
Category : Installation , Knowledge , Turf Care
1. Rake and remove all rocks, sticks and debris from surface area of the soil.
2. Add peat moss to soil.
This will retain water to feed back to the sod, as well as loosen the current soil structure. For heavy sand or clay soil, a soil amendment such as a new nutrient-rich compost or top soil, is recommended. (Note: Some top soils contain certain amounts of peat moss already. Too much peat moss will make your new lawn very “spongy”.
For maximum water savings, add our Stockosorb polymers to your soil. They absorb many times their weight in water and redistribute the water in a slower time-release process (1 teaspoon absorbs approximately 8 oz. of water. 1 lb. covers approximately 200 sq.ft.)
3. Roto-till the soil to a depth of 6-8 inches.
Rake again to remove additional rocks, sticks and debris that have been brought to the surface. A wide-tooth rake is excellent for this process.
4. Rake to form a smooth surface.
An iron rake works great for this. Soil compaction should be firm enough that that it will not sink or compact after the sod is laid and watered. However, it should not be too firm so that roots will not be able to work their way into the soil. The best way to test this is to walk across the soil. It should feel spongy underfoot, but not leave a very deep footprint behind. Sod should be laid on a lightly damp soil surface, so water the roto-tilled soil slightly, but make sure it’s not soggy.
5. Level to fill low spots.
Leave soil 2 inches below any cement, flagstone, walks and driveways. This will allow for the thickness of the sod roll, so that you will not have sod higher than their neighboring surfaces. Level ground 1-2 inches below sprinkler heads also. Slant the sod bed slightly away from the house/building to allow for proper drainage.
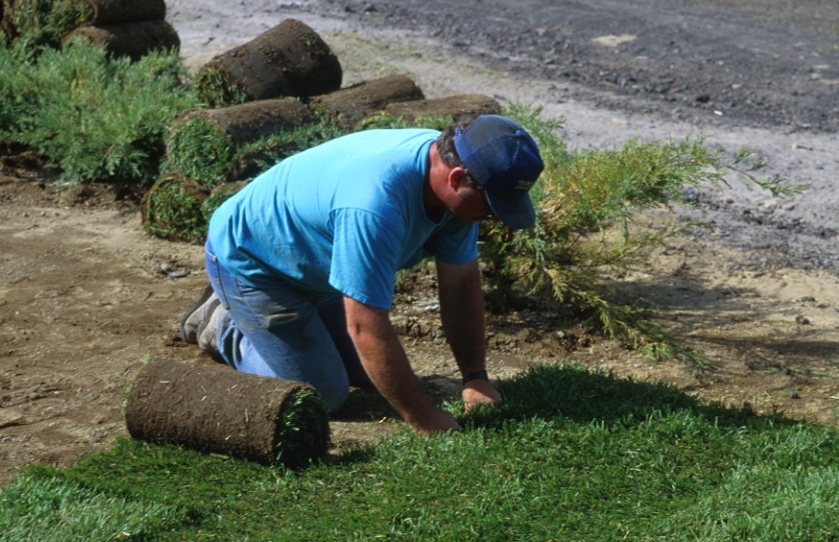
6. Begin the sod laying process along a straight edge such as a walk, patio or driveway. Lay sod horizontally with the house or street. For irregular or oval patterns, use 2 stakes with a string tied between to develop a straight edge. Using a straight edge for a guide will save you from wasting sod, not to mention less time cutting the sod.
7. Butt edges of sod together tightly to promote rapid knitting of edges and lay the sod in a staggered brick pattern. This will make the seams less noticeable. Use a sod knife (recommended) or a serrated knife to cut around trees, irregular borders and other areas.
8. Lightly fertilize the day of sod installation.
We recommend our fertilizer mixture, as it has been specifically designed for us and our New Mexico sod. A 50 lb. bag will cover approximately 7000-7500 square feet, which should last approximately 4-6 applications. Fertilizer should always be watered into the lawn immediately after application to avoid burning the sod.
9. Water sod heavily and thoroughly after installation for the first two days.
Thorough watering during the first 48 hours is crucial to the success of your sod. Water heavily enough to see water on the ground surface, but not standing water. This should be done 3 times per day for the first 2 days.
10. Water thoroughly every day for this first 10-14 days, but do not flood after the first 48 hours. After the 14th day, gradually reduce watering to every other day for a week. After 21 days, you should be able to determine if your sod will need more or less watering based on it’s response to your watering cycle. Check our Water Saving Advice to learn how to measure the amount of water your specific irrigation system distributes, as all irrigation systems differ.
11. Fertilize lawn 4-6 weeks after installation.
Fertilizer should always be watered into the lawn immediately after application to avoid burning the sod.
IMPORTANT INFORMATION
- Foot and pet traffic should be kept to a minimum the first two weeks.
- Two weeks after sod installation a majority of the roots will be bonded to the soil below.
- Three weeks after installation, the seams should start to disappear.
- Our turf blends should be fertilized 4 times per year: early March, late May, early September and late October.